
Non-invasive Madeira diagnostics
Yes, I admit, the following stuff all sounds pretty medical. But one of the basic needs of the collector of old wine bottles is to find out more about the state of the wine inside the bottle. The problem is that you don't really want to open the bottle. Too many people do not understand the need of recorking and so they might think that an opened and recorked bottle has been tampered with. So how can you assess the condition of the wine inside the bottle without having to open it?
You will not be able to change the conditions of storing that the bottle had been submitted to before you got it. But you can take care that the bottle will be stored in the best of conditions from now on. Even though Madeira wine does not depend so much on excellent storing conditions like other wines, you are well advised to store it in a cool place with a medium humidity. Before you rest your precious Madeira bottle for the next decades you will have to check the cork. This is the most important fact that is immediately responsible for the development of the wine once it has been bottled. It is almost impossible to determine the condition of the cork's material itself without extracting it from the bottle. I have tried to asses the structure of corks still in bottles with medical ultrasound but this proved to be rather unreliable. Also you have to remove the foil or wax cover to do this. You can try to asses the cork by examining the surface of the cork, but again this means you have to remove the cover. All this alters the original state of the bottle, something you would only do if you knew you really had to recork it. What you can do however is determining the length of the cork. The longer the cork, the higher the probability that it will survive the next years without loosing its ability to seal the bottle. If you can see the cork through the glass of the bottle neck everything is fine. Taking a picture with a camera with a flash will light the cork in a good way to determine its length.
Flashed cork in a bottle neck
But what do you do when the cork is hidden under foil, wax, paper or a straw cover? The best way then to determine the length of the cork is x-raying the bottle neck. With the right exposure it is possible to find out about the length of the cork even under a lead capsule.
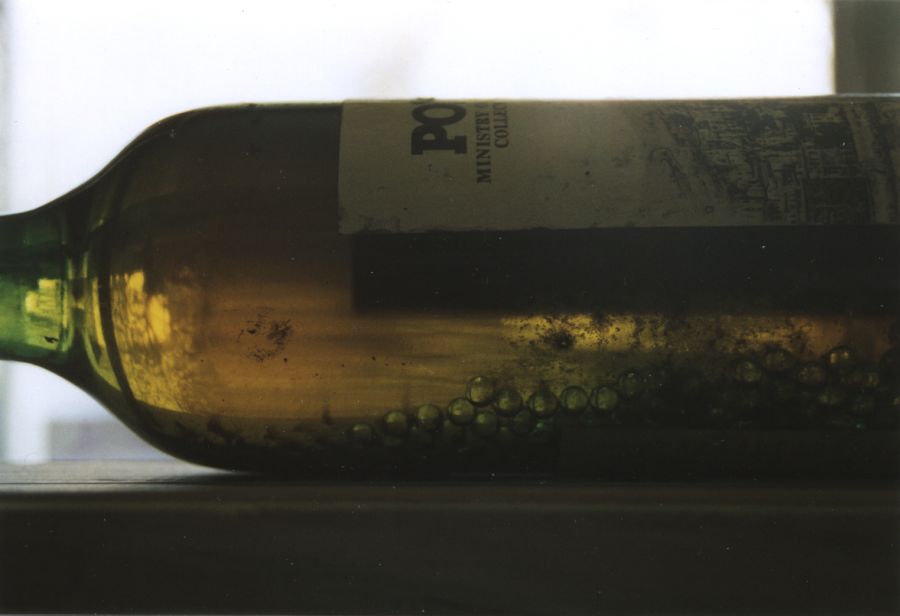
It might take two or three shots to get the right exposure but I guess your bottle really doesn't worry too much about radiation. The first example below shows a very short stopper cork covered by a lead foil capsule. The second shot shows a medium sized cork covered by paper. In both examples the original state of the bottle has been maintained. And by the way: can you see the level of wine in the second picture? There are Madeira bottles so dark that it is hard to determine the level of wine in the bottle, x-rays help get the information.
X-rays of short cork under lead capsule

X-rays of medium sized cork under paper cover
[Img Coming]
X-rays of medium sized cork under paper cover.
About The Recorking Of Old Madeira Wines
Basically you should have any old wine recorked about every thirty to forty years. Francisco Albuquerque, the oenologist and quality control manager of the Madeira Wine Company, even thinks that recorking should be done every fifteen years. Anyway, it is best to have a professional do this for you. There are some mistakes easily to be made that can lead to the complete loss of the wine. So, only do this if you can find nobody else. Also it has to be said, that if you want to keep an old bottle as a financial investment, you should have this bottle recorked by a well-known reliable pro. If you do the recorking yourself, the financial value of the bottle will go down since it is not “original” anymore and you have no proof of the authenticity of the wine inside.
The following text describes how I do it, it is neither the perfect reference method, nor is it fool-proof. Until writing these lines, I have recorked about fifteen old bottles so of course my experience is limited. On the other hand, until now I have never lost a bottle and the recorked bottles are doing fine so far, the first being recorked in 1998. During this time I have tried several new things and dropped some old ones; I am still learning. Please read the complete text several times and make sure you understand it in detail before you recork any precious old bottle! If you have any questions fell free to email me and ask me in detail.
Warning: Do none of the following procedure with any hand-blown or very old manufactured bottles. These bottles crack so easily, that you should not take the risk of recorking them. (How do you know if a bottle is hand-blown or manufactured? Please refer to the chapter about old bottles!)
You need a number of things to recork an old bottle. Do not use these items for anything else, as they might give off some strange odors to the wine. Some of these items you will have to buy at a special shop, most things will be found in the kitchen. Corks, handcorking machine and sealing wax might be found at your local winery, or using the internet. Feeding the usual search-engines will give you the needed shops that sell everything for home-brewing and associated activities. Before using these items, wash them with very hot water, do not use a detergent, and let them dry on a clean towel.
You will need the following items:
- Corkscrew: Take a good one! Nothing is worse than a crumbled cork.
- Receptacle: Should have the volume of a quart or so (at least the volume of a wine bottle plus).
- Funnel: Try fitting it into the opening of a wine bottle, before using it!
- Corks: The standard size is about 20 to 21 mm in diameter and about 38 to 45 mm in length. You will have to find real corks, because so-called agglocorks can not be handled by a handcorking machine. Artificial corks made of silicone and other materials also won’t work. Before using the corks they need to be put under cold water for 24 hours, this is very important! If you can’t find a new cork then there is one last alternative. You can use an old cork if you take care of three things: Take the wanted cork out of the bottle with a very thin and sharp corkscrew; the best way to do this is to use a corkscrew with two little blades that are inserted between cork and bottle. The cork is then removed without damaging it. Make sure the cork is of good length and in good condition without any sealing wax. A cork from a higher priced wine bottle should do the job, the newer the cork is, the better. The cork will then be turned upside down when it is inserted into your Madeira wine bottle, so any traces of the former wine should not go into your Madeira wine. It is always better the use a new cork, but I did take two used corks for the recorking of two Russian Massandra bottles with very thin bottle necks. This took place in 1999 and the corks are doing fine so far... If not sure about the two ends of the cork, it is ok to cut off a thin slice with a very sharp knife. Any traces of wax or other materials should be getting removed by doing so. The wine will not touch the cork anyway since it is going to be stored in an upright position.
- Sealing wax: You can use the real sealing wax for sealing documents, but this is rather expensive and also contains collophonium which can irritate your mucous membranes and might give off some strange aromas to the wine or your wine cellar. The special sealing wax for bottles comes as a powder. If you can't find both, use ordinary household wax, but do not use any perfumed candles for this!
- Handcorking machine: You will find this item in the internet or in a special shop, it is less expensive then you think! If you can't get a handcorking machine using cone-shaped corks can be an alternative. The corks are then hammered into the bottle with a small hammer. However the bottles will not be sealed air-tight enough to be stored in a down position, but Madeira wine should be stored in an upright position anyway. Do not hammer corks into bottles of pre-industrial make! These bottles are very likely to burst and the wine will be completely lost!
- Glass balls: Do not use colored glass balls as the colors might go into the wine. There are small glass balls for heating procedures in a laboratory or as a filling material in cooling pipes in distillation machines. You will need the glass balls to compensate for evaporated wine to bring the filling level in the bottle back to normal. Check if they fit into the wine bottle first!
- Rectified spirit: You will need about half a pint to disinfect the glass balls and the cork. As John Trobley in a post on the Madeira forum pointed out, great care should be used to use undenatured spirit or methylated spirit containing only completely volatile denaturing (rectifying) agents. Some rectified spirit contains an extremely bitter and nonvolatile compound called Sucrose Octaacetate. Other compounds that may be problemantic are Denatonium (also extremely bitter), crotonaldehyde, and gasoline. If spirits containing these substances, which are foul, bitter, or toxic, are used to sterilize the glass balls, it's possible that the bottle will be ruined and become undrinkable. So either use undenatured spirits, or spirits containing, say, only methanol (methyl alcohol). In the United States, undenatured industrial alcohol is available in some states under the brand-name Klear-Vue, and this should work admirably. If in doubt, make sure that the spirit used is ok by simply tasting a small potion of it.
- Small drinking glass: to put the glass balls and the rectified spirit into.
- Table spoon
- Coffee spoon
- Sharp knife
- Clean tea towel
- Old cup, microwave safe
- Saucer
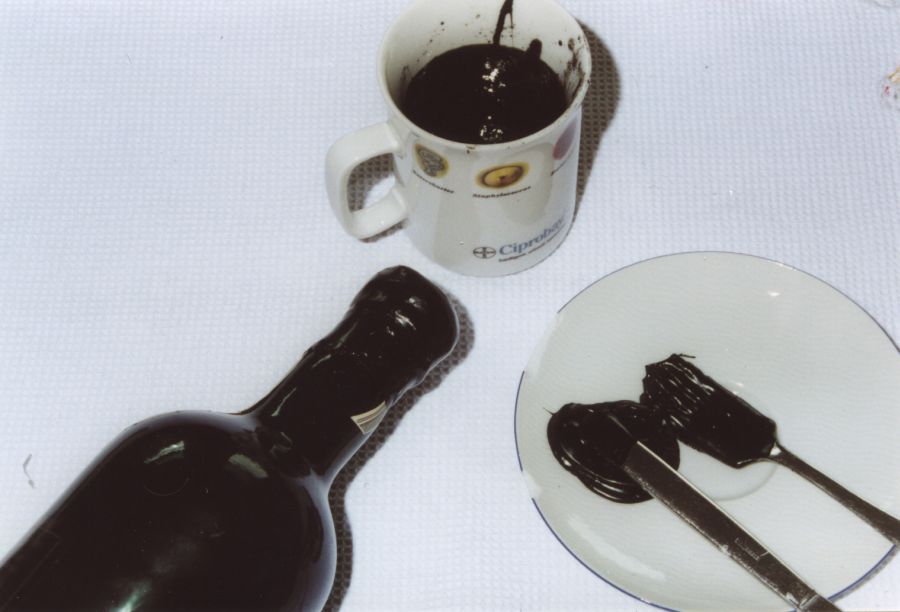
All the necessary things
Try having someone to help you, it makes the following a lot easier and it is more fun too.
24 hours before starting the recorking procedure the corks are put into cold water. It is important that the corks are drowned completely. Put two or three spare corks in, they can be dried afterwards and used again.
Next day, the fun starts with the "peeling" of the bottle. Use the table spoon to carefully hammer the old sealing wax from the bottle, very much like peeling an egg. With the knife you can scrape remaining wax away. The cork should be completely clean from wax. If the bottle is very old, the procedure of peeling it can result in a crack or even in breaking the bottle. So use the alternative method: “shave” the bottle with a rather sharp and stable knife.
Peeled cork
The cork is then removed with a corkscrew. Put the cork aside, it will not be reused, but can give you some clues on how the wine was stored.
If you want to put a little wine aside for later tasting, this is the time! But remember that Madeira takes some time to open up, after a long time in the bottle. I usually take a sip at once, then two or three hours later to get an impression of how the wine is opening up.
The glass balls are put into the drinking glass, the glass is then filled with rectified spirit. Put a saucer on the top to keep the spirit from evaporating to fast.

Glass balls
The glass balls are put on the towel, the rectified spirit will quickly evaporate from the glass balls. With the teaspoon you put as much glass balls into the bottle as necessary to bring the level of the wine back to normal. One to two thumbs under the cork is a good level.
Glass balls in the bottle
Dip the wet cork into the rectified spirit and put the wet cork into the handcorking machine. Your helping hand secures the bottle with one hand. The corking machine is put on top of the bottle. The correct position on the bottleneck is secured with the second hand. Now it is your turn. It is essential that the cork is pressed into the bottle with one fast motion. Coming out of the handcorking machine, the cork has been pressed together by the machine and is now reduced in diameter. So when entering the bottle, the air inside the bottleneck can move along the cork to the outside. If this is done too slowly, the cork will expand too early, the air from the bottleneck will be trapped and the pressure in the bottle will rise to dangerous levels! A bouncing cork will be the best result; a broken bottle will be the worst! You better practice this before! So do this quick and with some power. The cork should go in for at least three fourths; any remaining cork outside the neck can be cut off with a sharp knife. Again: Do not recork any hand-blown bottles, it is just too risky!
Let the cork dry for fifteen minutes and wipe the bottleneck with some rectified spirit to ensure a good contact with the sealing wax.
The sealing wax can be heated in a tin cup on a camping stove; I prefer an old cup and the microwave. Choose a medium setting and watch the wax carefully, it melts faster than you think. (Rule of thump: a full cup of sealing wax powder takes about 5 minutes at 700 watt to melt) When the wax is completely melted, take the bottle upside down and dip it into the wax, until the neck is covered for about two thumb's widths and pull it out in a quick motion. The wax takes about one minute to harden again, if you use your own seal, you can press it into the wax now. The remaining sealing wax can stay in the cup for the next time. Do not seal any hand-blown or very old manufactured bottles. Old glass can not stand sudden changes in temperature and is very likely to crack when you dip the bottle neck into the hot wax! If you really want to be on the safe side, gently warm the bottle neck with a hairdryer before sealing it. This lessens the difference in temperature and should reduce the risk of cracks. Also the cork will be completely dry and the sealing wax will stick to it very well.
Sealing
The complete procedure takes about thirty minutes per bottle.
You must be logged in to post a comment.